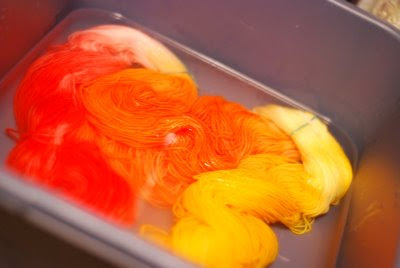
So last week, I ventured for the first time into hand dying. And I used, what else, but Kool-Aid! I decided that I would show you a bit about the steps of dying with Kool-Aid, complete with pictures. And dying with Kool-Aid is not that messy. The only thing beside my yarn that got dyed were my finger tips!
I followed the instructions found at Knit Picks and also consulted a tutorial on Eunny Jang's website for additional tips and tricks.
1. The first step is to purchase a plain undyed yarn. I chose Knit Picks Bare Fingering Superwash/Nylon Blend. If you prefer, you can chose Eunny's route and pick a pale color and over-dye only in certain areas. The only trick is it must be an Animal Fiber.
2. The next step is to split the yarn into thirds and mark each section with scrap yarn. This creates three different areas for various colors. If you want to get really technical and create exact strips, consult Eunny's tutorial, she tells you exactly how to accomplish this.
 3. Next, wash the yarn with wool soap and lukewarm water. I particularly love Friendly Products Sweater Soap. I got mine at Slip Knot but I am sure you can find it elsewhere if you don't live near Newtown Square, PA. The lavendar scent is divine.
Rinse to get the soap out.
 4. Prepare your solutions. I used Mason/Glass Jars and 2 packets of Kool-Aid for each jar mixed with plain old tap water. The next time I do this I will probably use 4 packets per jar, to get a little more color absorption to the center of the yarn. The two pick colors ended up being a little to similar, so I put a few extra orange packets into one of the pinks in the middle of dying to give it a nicer color.
 5. Next, put the yarn in the jars and the jars in a large pot filled with water. Now, turn up the heat. You want the water almost boiling. Once that happened I turned off the heat and covered the pot for about 30 minutes. Make sure to stir frequently throughout the heating process. Additionally, you can avoid too much white gaps between the sections of yarn by moving intermediate sections between the two colors periodically to create a "transition". Warning: your yarn will smell delicious, please try to resist the urge to gobble it up in the middle of dying.

6. Let the yarn cool in the pot uncovered.
7. Wash your yarn again and rinse several times.

8. Hang to dry. My bathroom door provided the perfect spot.
 9. Cut the temporary scrap yarn and twist into a skein. Take photos of your hand-dyed creation and scheme up a project for your yarn. Name your color creation. I call mine It's Electric.

 I think a pair of Fruit Loop Socks would be perfect for this yarn. I have one more Bare skein at home, and finally found some blue and green Kool-Aid Packets at my grocery store, so look for more Kool-Aid creations in the future.


1 comment:
Oh, a lovely, unique colorway.... great "how to" post!
Post a Comment